Category Archives: Uncategorized

Laundry Organization

Pardon the one-photo post, this may be the smallest space in the entire house (excluding closets, of course), but I am so excited to be making progress in the laundry room. We didn’t have a laundry room in the town house, just an area dedicated in the kitchen. It’s definitely nice to have one area to hide the washer and dryer!

This room is tiny, but we spend a lot of time in here every week, so it needed to look nice enough and be functional. I don’t have any before photos, but imagine the after photo, with nothing on the walls. Yep, all of our cleaner was stacked on top of the dryer, which drove me nuts! My sweet husband installed shelves along the long wall, and a couple along the short one for bonus storage. This had made a world of difference, let me tell you! Then it was just time for me to shop for baskets, and fill up the shelves.

You’ll notice I even added a couple of non-functional pieces, purely to seem more decorated. I’ve got a couple more things to do in here, and I would have loved to paint before we installed shelves, but it just didn’t work that way. We’ll call this in-progress-done, for now!

Leave a comment

Filed under Uncategorized

Our Dining Room

Meet our dining room (before.)

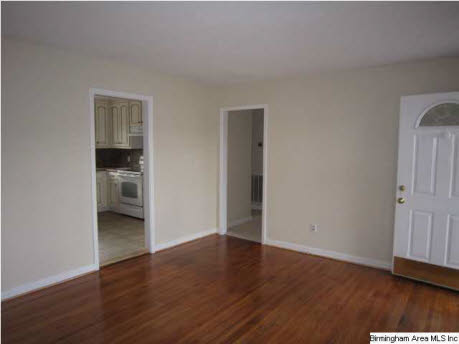
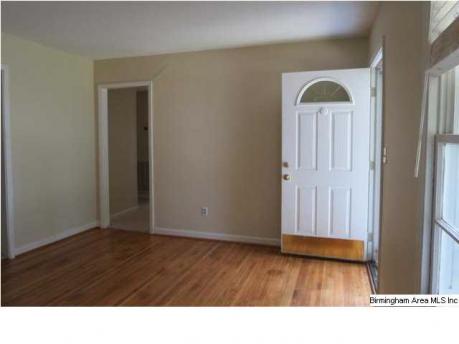
I’ve avoided “progress” photos of the dining room as much as possible so far (even though we had painted and added furniture right away.) Originally the room that we are using as a dining room was the living room. Just a small box—the first room that you walk in when you come in the front door. With the entry door, a window, the doorway to the kitchen, and the doorway to the hallway, it’s a room that would be hard to work living room furniture around in!

Luckily for us, some time ago the previous owners closed in a garage (or carport, I don’t really know) to make a family room/playroom. From the first time that we looked at the house, I knew that we would use the original living room as our dining room. One of the main reasons that I felt compelled to make the switch was that the only dining space in the house was a small corner in the kitchen (where the wicker furniture and bar top are now.) I have always wanted a big(er) dining room table that can host friends and family for dinner, so it seemed like the right thing to do. Only problem was that the table and (2) chairs that we had at the townhouse were not helping to fulfil that dream. I had the space, just not the table.

Once our offer was accepted, I began hunting for a solid older dining set that I could add to my eclectic mix of furniture. I didn’t want anything really new looking, as it would stand out amongst a 1960s china cabinet (that I wasn’t willing to part with.) So for the last 5 months, I’ve been checking Craigslist, walking through antique stores and flea markets, and even beginning to consider buying something new. I didn’t want to spend an arm and a leg though, as we are saving for a few items and projects right now, and I didn’t want the dining room table and chairs to set us back.

I finally found a great 1950s (I think) mid-century set that I loved!

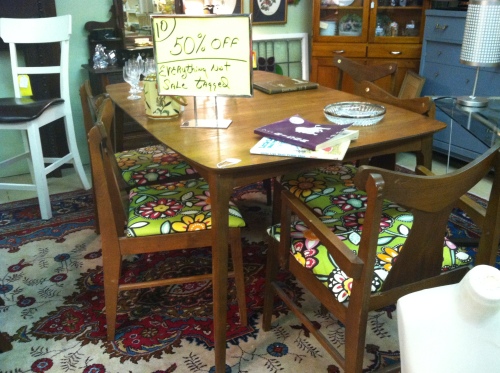
The stain was great, not to dark, but not to light); it was sturdy and had minor wear and tear, and it even has an extension leaf! I was in love. But wait, then I realized that the antique store that I was at was having a big sale to clear some things out (in preparation for spring cleaning and new items coming to the store.) It was 50% off!

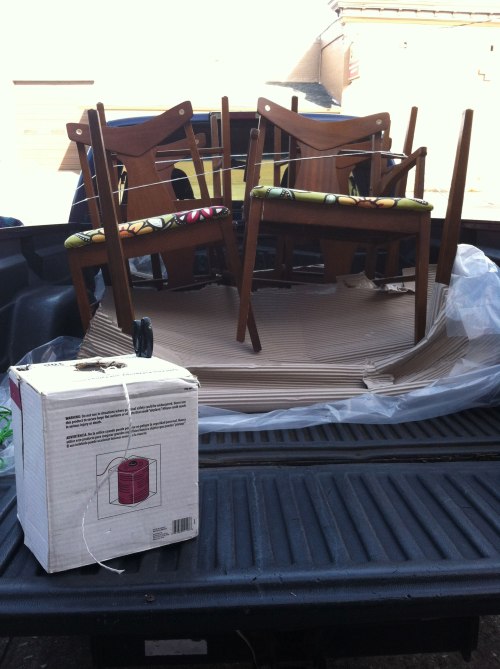
It was a Saturday, so Derrick was at work. I quickly texted him to get his buy-in (I couldn’t buy it if he hated it.) I also texted my mom to see what she thought. Once I got the okay from Derrick, and my mom’s stamp of approval, I was off to switch cars with Derrick and I brought this baby home!

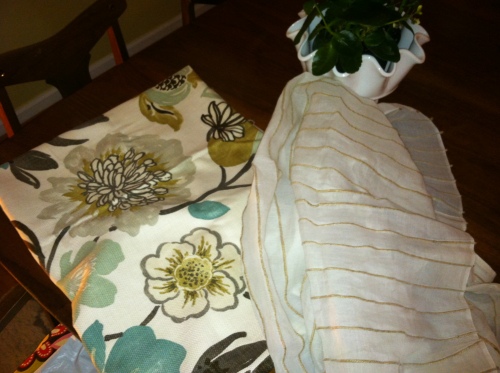
Now, jump to this past weekend. My mom came up on Saturday and we recovered the chair cushions using some fabric that I’ve had for quite a long time—I’ve been waiting for the perfect place to use it. We also hung some curtains that I had leftover from the old house.

Suddenly, this room feels so homey and welcoming! I love that it’s the first room that you walk in at my house, and that we have to walk through it to get from the living side, to the kitchen and living room. Ready for the afters?!


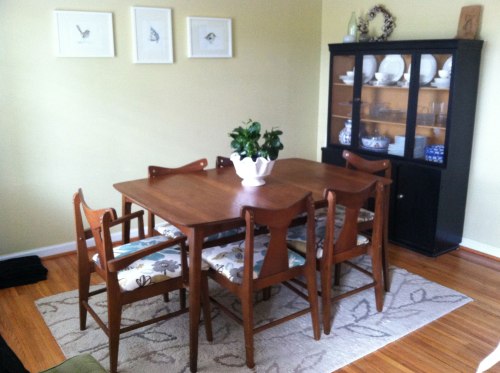
(Looking at the china cabinet. Entry to the kitchen is directly to the right of the cabinet.)


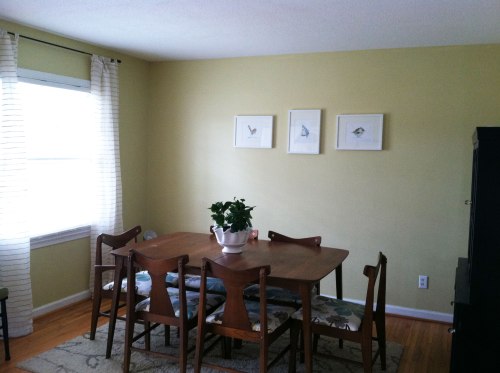
(Looking to the window. Front door is directly left of the window.)


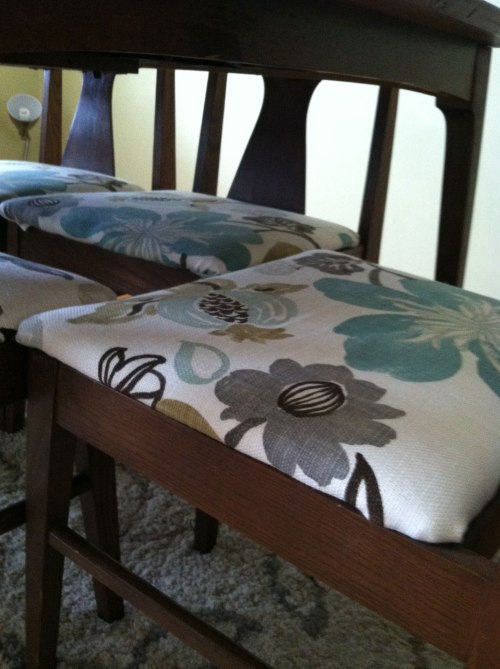
(Close up of the newly recovered chairs.)

I still need to switch out for a more simple rug below, and hang lighting over the table. I’ll have my electrician get on that! 🙂

The best part of the table make-over is that I spent virtually no money outside of purchasing the table (for 50% off!) Score!

Leave a comment

Filed under Uncategorized

Water Heater Fun

We’ve been tackling small projects around the house while we save up for the bigger ones (new double-pane windows, possibly an additional bathroom added, etc.) This past weekend we worked on the copper pipe that runs the hot water for the water heater. We had a leaky elbow joint at the relief valve, so we decided to cut out a bunch of the old pipe and start fresh. I had my doubts about us handling this project without professionals, but my husband was confident in our abilities!

A trip to Lowe’s was in order to pick up a relief valve, a 10 foot piece of 3/4″ copper pipe, and a few copper elbow joints and couplings. You’ll also need a metal scorer/cutter, a torch, flux, and solder- we happened to have these things already.

We started by draining the tank of about a third of the water (to get the water line below the valve we were removing.) Experts suggest running your water in another location (say a bathroom sink) to keep the lines open to reduce pressure build up in the water lines. Don’t forget to open the relief valve up 90 degrees to allow air to move in the tank to allow your water to drain. Update: We have a gas water heater, so we killed the flame and turned the gas off. If you have an electric water heater, you should be fine throwing the breaker to cut power at the source.

We proceeded to the next step which was removing the old relief valve and scoring/cutting the pipe where we wanted to end the replacement pipe.

This step was a million times easier than I expected it to be!
 
We then inserted the new relief valve (don’t forget your thread tape for your threaded ends- this should help to reduce the possibility of future leaks!)

 
Then you just place elbow joints, pipe, and couplings where needed to reconnect the original pipe line with the new one. We made all of our cuts on the copper pipe using a scorer- super user friendly and got the job done in a matter of minutes.

 
Each copper pipe piece and coupling or elbow needs to have flux brushed at the joint- flux will help to clean debris that would prevent a solid solder seal, as well as help draw the solder into the seam.

We learned that if you heat your pipe without he torch first, then the solder melts on contact.

 
This is much easier to control then placing the solder in the flame. Once we had all of the joints soldered, it was time to turn the water back on and let the tank fill while we waited to test our handiwork for leaks. We also needed to re-ignite the flame (again, because we have a gas water heater.) We turned our knob to the pilot light setting and held down while we lit the flame. We held the knob down for 60 seconds, and then released. We were lucky enough to have it take the first time, but we were instructed that had the light gone out, we would just need to try again. Once our light was ignited, we turned the knob to the on position. Disclaimer: Playing with gas and fire is dangerous. If you’re inexperienced or not comfortable doing it, hire a professional.

All ended well for us, and we saved a ton of money tackling this project on our own!

Leave a comment

Filed under Uncategorized

An Update of Sorts

It’s funny to think that we’ve been in the new house for a week already. I actually feel very settled in and like we can just live normally (i.e. not do projects every night after work!)

Lately, we’ve just been catching up on laundry, vacuuming, grocery shopping (thank goodness for being able to eat at home again!) and tackling very small to-dos. Over the weekend we raked the front yard—I can’t tell you how many leaves we had! I know we will love our two big shade trees in the summer, but right now they are a lot of work! Seriously, our house sits to the front of the lot, so the front yard is fairly small, but we have more leaves than I thought possible!

We also hung our new front porch light, some frames in the dining room, and some oohs in the bathroom. I need to take some new photos so that I can do some before/after pictures. Hopefully soon!

We spent Sunday afternoon cleaning the old house. I’m turning in our keys today, and it’s a little bittersweet. I’m so happy to finally have our own space, but we’ve been in the old place for four years this week! A lot went down in the townhouse—we got married, got a dog, Derrick started school, etc. Oh well, thanks for the memories Homewood Townhomes!

More photos to come soon.

Melissa & Derrick

Leave a comment

Filed under Uncategorized

We’ve Closed and We’ve Cleaned

We closed on time and as scheduled last Wednesday (Happy Halloween!) Closing was not what I expected, much easier than many other people’s experiences. Maybe it’s because we were prepared for the worst since the motto of this home buying process has been everything that can go wrong, will go wrong. 

We’ve spent every night and all weekend working on getting the house move-in ready. We’ve painted, cleaned, changed light fixtures, cleaned, hung blinds, cleaned, rewired some bad electrical wiring, and cleaned. Oh, did I mention that we’ve cleaned? It’s amazing how much dust you’ll find in a house that has been sitting empty for more than a few months!

I’m excited to share photos of the progress we’ve made—hoping to get some tomorrow morning when I’ll have natural light to work with. The house is definitely a work in progress and we can’t wait to see what the next few years bring in the way of changes and upgrades! 


Leave a comment

Filed under Uncategorized